Exposure vs. Composition: The Filmmaker’s Ultimate Dilemma
May 05, 2026This blog post is based on content from my Pocket Camera Guides book. If you want a physical guide you can actually take with you while shooting, click here.
- https://www.thefilmalliance.com/pocket_camera_guides
The Opening Frame: Defining the Conflict
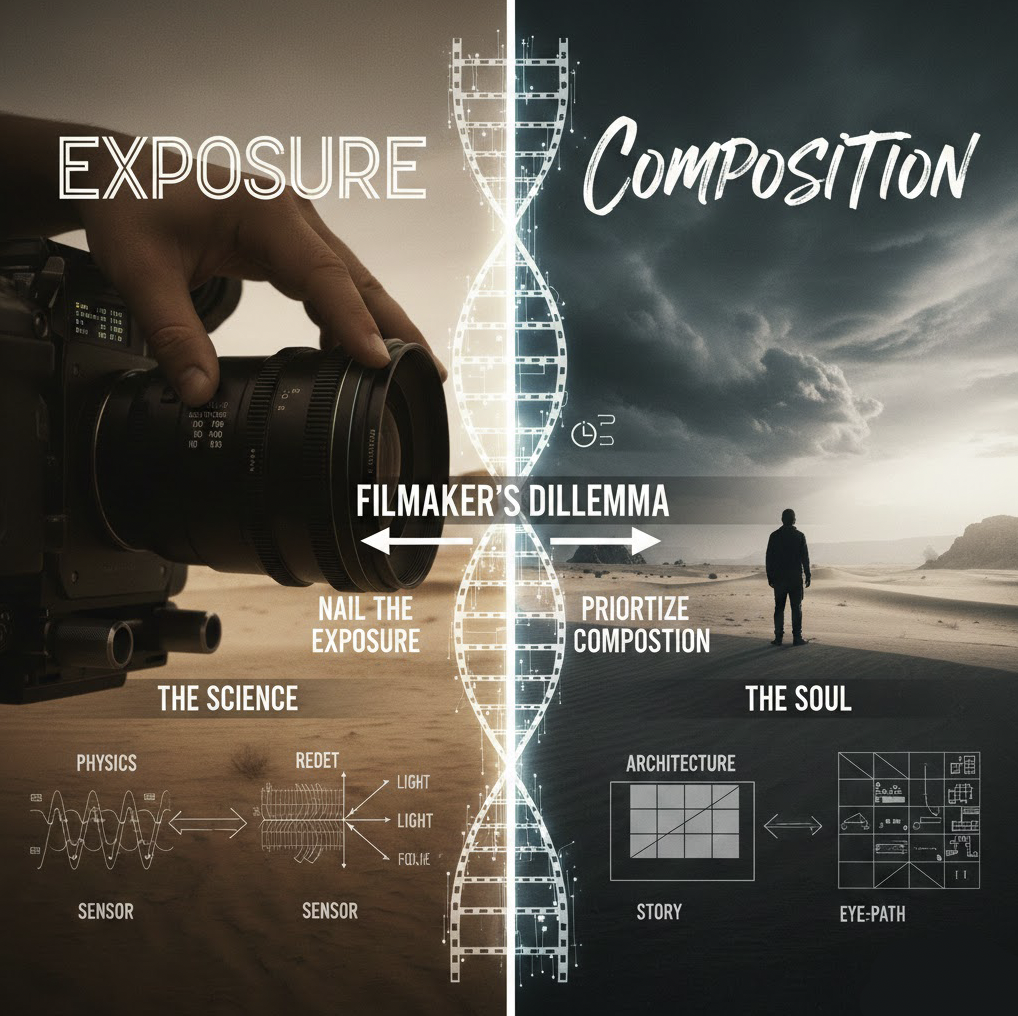
I’ve spent half my life squinting at monitors and fighting the elements. There is a specific kind of frustration known only to the cinematographer: standing in the middle of a desert at high noon, desperately trying to maintain a shallow depth of field for an intimate close-up while the sky threatens to blow out into a featureless white void. In those moments, when the clock is ticking and the light is failing, you are forced to make a choice. Do you nail the exposure to preserve the texture of the world, or do you prioritize the composition to tell the story through geometry?
This is the filmmaker’s ultimate dilemma. On one side, we have Exposure: the technical management of the "Exposure Quartet"—Aperture, Shutter Speed, ISO, and ND Filters. It is the physics of how much light hits the sensor. On the other, we have Composition: the intentional arrangement of elements within the frame to guide the viewer’s eye. It is the architecture of the story. One is the science of the image; the other is its soul.
The Case for Exposure: The Physics of Mood
If composition is the skeleton of a shot, exposure is its DNA. It determines the "vibe" before a single line of dialogue is spoken. As a DP, I view light as a tactile medium. Technical mastery allows us to manipulate the very density of the air in a scene.
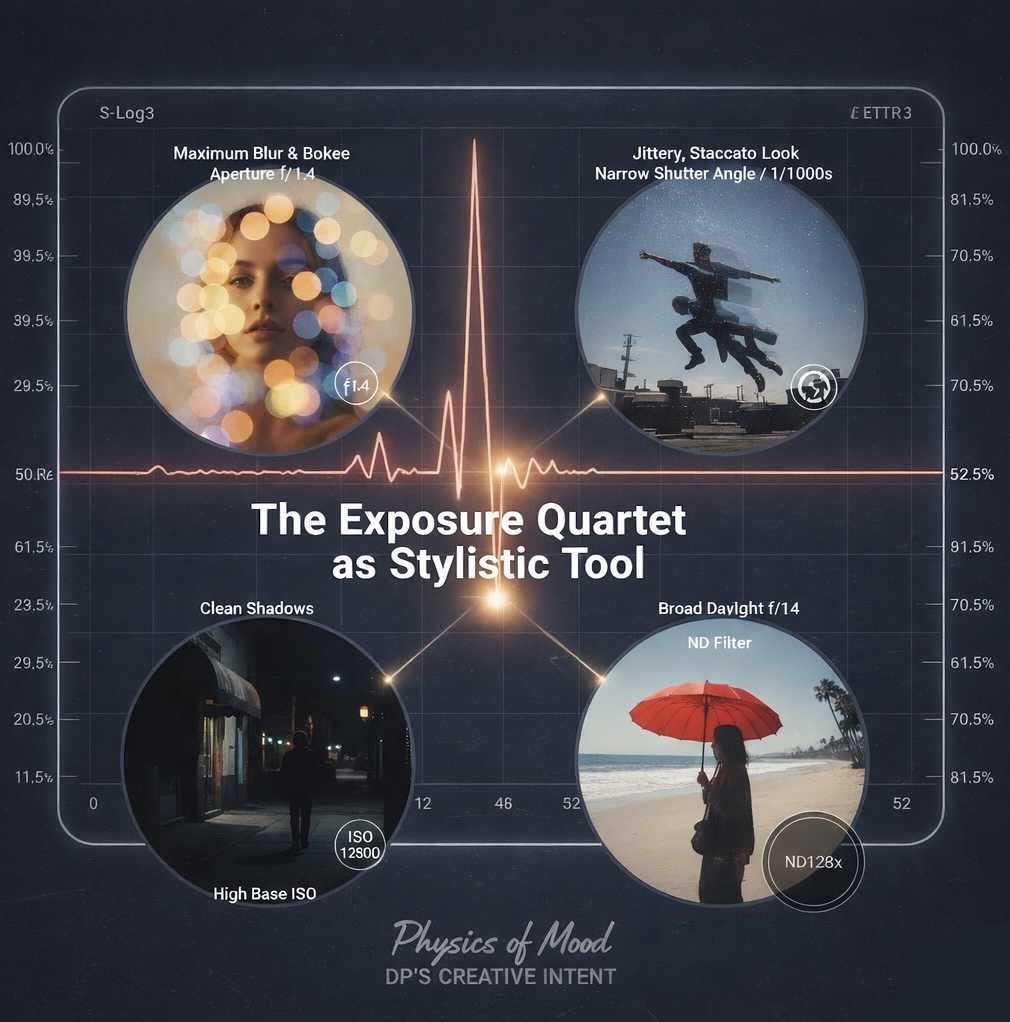
The Exposure Quartet as a Stylistic Tool
We don’t just set exposure to see; we set it to feel. Each element of the quartet offers a specific creative trade-off:
• Aperture (f-stops): This is our primary tool for depth control. I might use f/1.4 to f/2.8 for "Maximum Blur & Bokeh" to isolate a subject in a dreamy wash of color. For street videography or general narrative work, I often live in the f/4 to f/8 range for "Balanced Sharpness"—keeping the subject crisp while maintaining moderate background separation. Only for expansive landscapes do I stop down to f/11 or f/22 for "Maximum Sharpness."
• Shutter Speed & The 180-Degree Rule: To maintain natural-looking motion blur, I follow the 180-degree rule, setting the shutter speed to double the frame rate (e.g., 1/50s for 24fps). Breaking this rule with a narrow shutter angle creates a jittery, "staccato" look for high-stakes action, while a wide angle (>180°) creates a smeary, "dreamy" disorientation.
• ISO & Gain: This is the balance of cleanliness. While I strive for the Base ISO for the highest dynamic range, I know when to jump to the High Base ISO on dual-native sensors to keep shadows clean in low light.
• ND Filters: These are the "glue" of the quartet—literally sunglasses for your lens. They are the only reason we can shoot at f/1.4 in broad daylight while respecting the 180-degree rule. Without high-density NDs, the physics of light would dictate our aesthetic, rather than our creative intent.
To ensure no data is lost to "clipping" (crushed blacks or blown highlights), I rely on the Histogram and the Expose to the Right (ETTR) technique. When shooting in S-Log3, I don't just eyeball it; I use a waveform to hit a specific Skin Tones Target of 48-52% IRE (or zebras at 52% +/- 2). This ensures the most data is captured for the grade.
The Case for Composition: The Architecture of Story
While exposure is governed by the laws of physics, composition is
pure poetry. It is the silent language of the director. Even a perfectly exposed frame is a failure if the viewer's eye has nowhere to land.
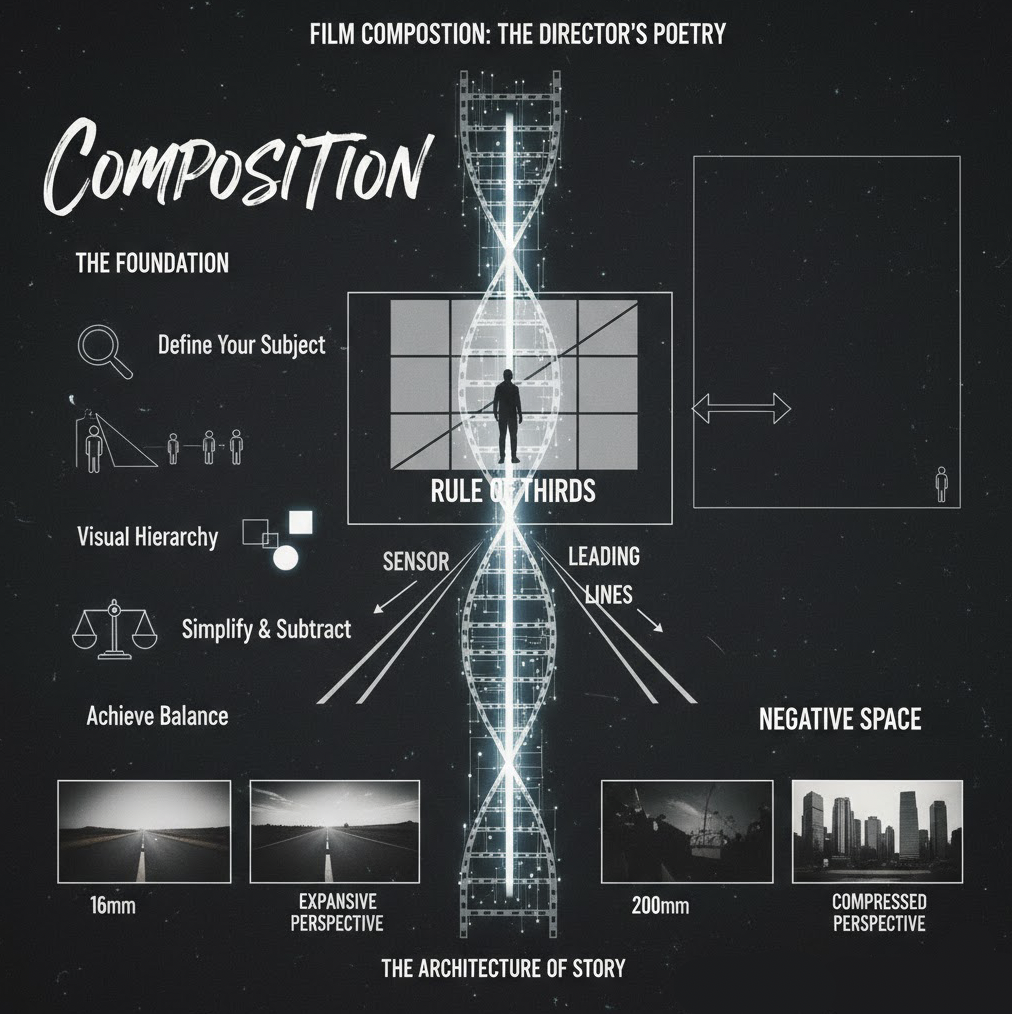
The Foundation
Before I even touch the lens, I establish the architecture of the shot based on four core principles:
1. Define Your Subject: Deciding what the "hero" of the frame is—a person, an object, or a feeling.
2. Create Visual Hierarchy: Using focus, lighting, and size to tell the viewer what to look at in order of importance.
3. Simplify & Subtract: If an element doesn’t add to the story, I remove it. A clean frame has more impact.
4. Achieve Balance: I treat the frame like a scale, balancing a large, dark object with a smaller, brighter one to create visual equilibrium.
Rule of Thirds: I divide the frame into a 3x3 grid, placing key subjects along the lines or at their intersections to create a dynamic, balanced shot rather than a static one.
Leading Lines: I use roads, fences, or architectural elements to draw the viewer’s eye through the frame toward the subject. These lines can be straight, curved, or diagonal to change the energy of the shot.
Negative Space: By intentionally leaving large, empty areas around a subject, I can instantly evoke feelings of scale, loneliness, freedom, or calm.
The choice of Focal Length is my final compositional brushstroke. A 16mm lens provides an "expansive perspective" with barrel distortion that feels immersive and grand. Conversely, a 200mm telephoto lens offers a "compressed perspective," exhibiting pincushion distortion that flattens the image and brings the background intimately close to the subject.
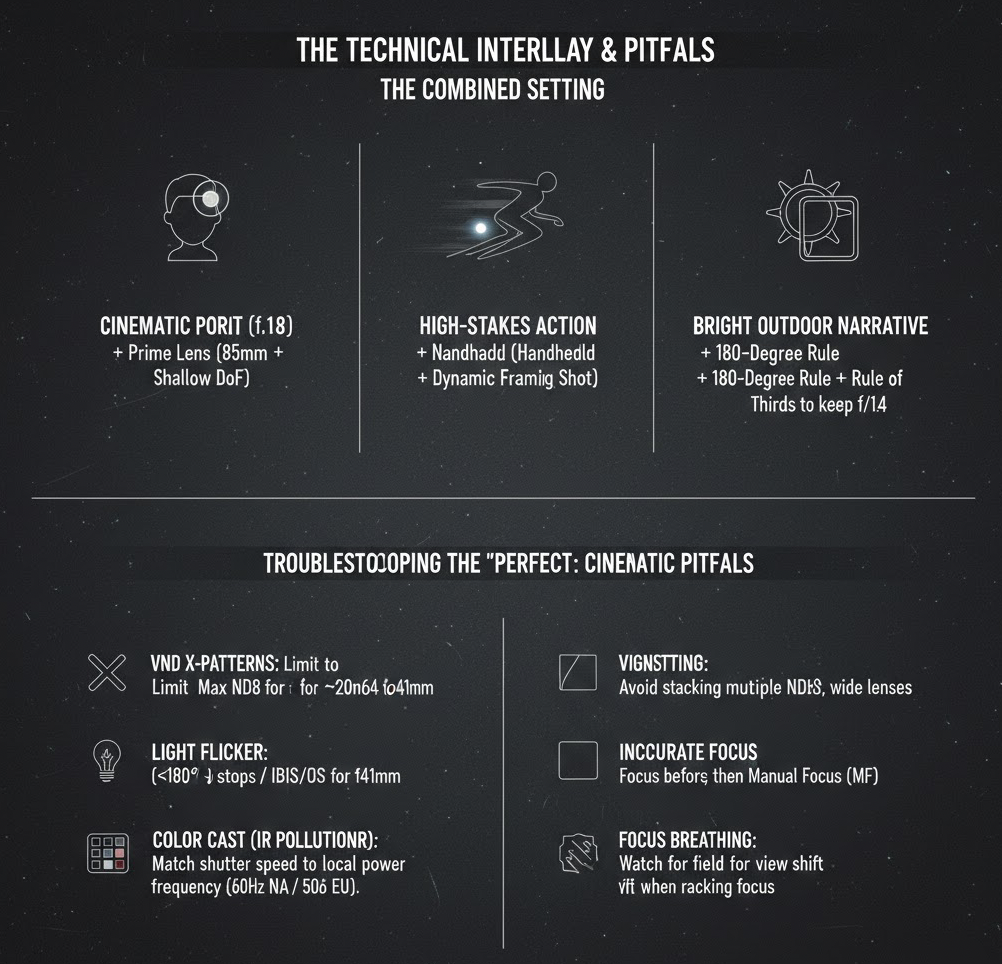
The Technical Interplay: Where Light Meets Frame
In practice, these two worlds are inseparable. Your creative goal dictates both your light and your lines.
|
The Creative Goal |
The Combined Setting |
|
Cinematic Portrait |
Large Aperture (f/1.8) + Prime Lens (85mm) + Shallow DoF to isolate the subject. |
|
High-Stakes Action |
Narrow Shutter Angle (<180°) + Handheld (IBIS/OIS) + Dynamic Framing. |
|
Bright Outdoor Narrative |
High-density ND (10+ stops / ND1024) + 180-Degree Rule + Rule of Thirds to keep f/1.4 in strong sunlight. |
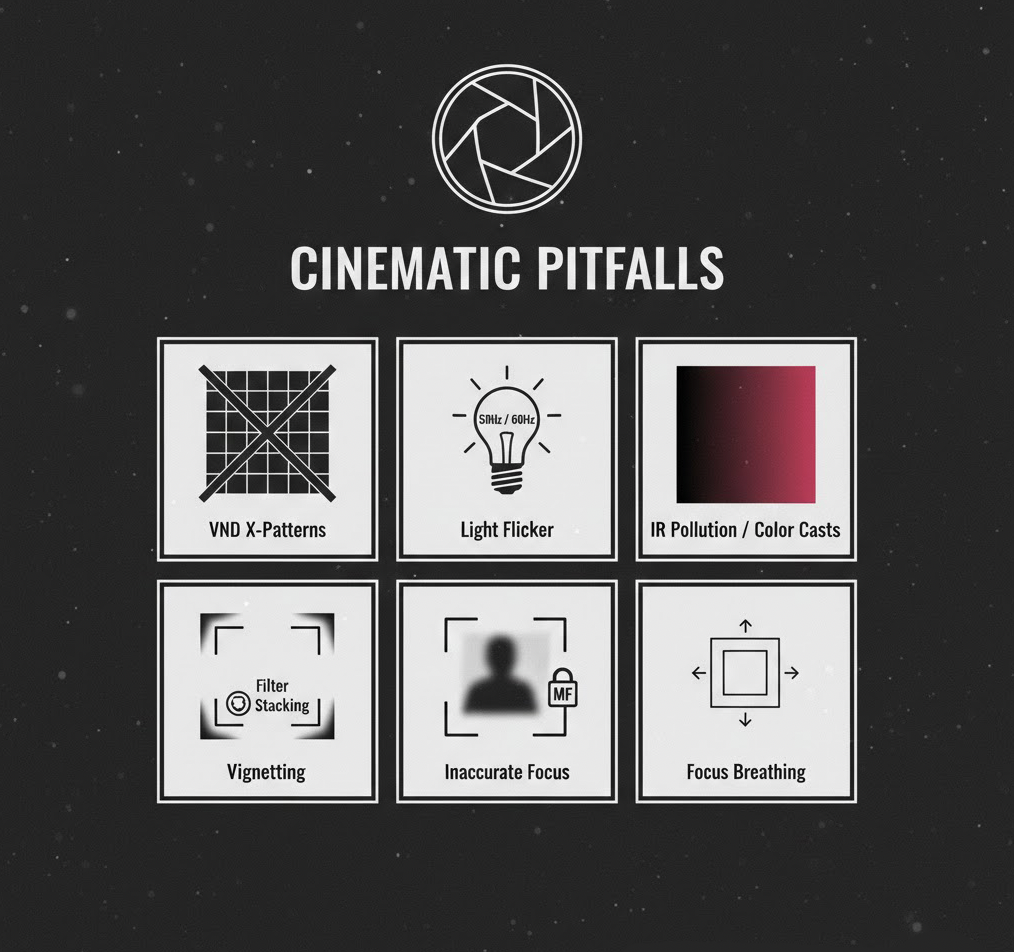
Troubleshooting the "Perfect" Image
Even with a clear vision, technical setbacks can ruin a shot. Here is my checklist of "Cinematic Pitfalls" to avoid:
• VND X-Patterns: Be wary of using variable NDs on wide lenses at max density. As a rule: limit to Max ND8 for ~20mm and Max ND64 for ~41mm.
• Light Flicker: Always match your shutter speed to local power frequency—60Hz in North America vs. 50Hz in Europe—to avoid distracting light pulses from artificial sources.
• Color Casts (IR Pollution): Strong NDs can turn blacks into a muddy reddish-magenta. Use high-quality IRND filters to maintain color purity.
• Vignetting: Avoid stacking multiple filters, especially on wide-angle lenses, to prevent darkening in the corners.
• Inaccurate Focus: Remember that very dark ND filters can prevent your camera’s autofocus from working. Compose and focus before attaching the filter, then switch to manual focus (MF) to lock it.
• Focus Breathing: Watch for the distracting shift in the field of view when racking focus; it can break the immersion of an otherwise perfect composition.
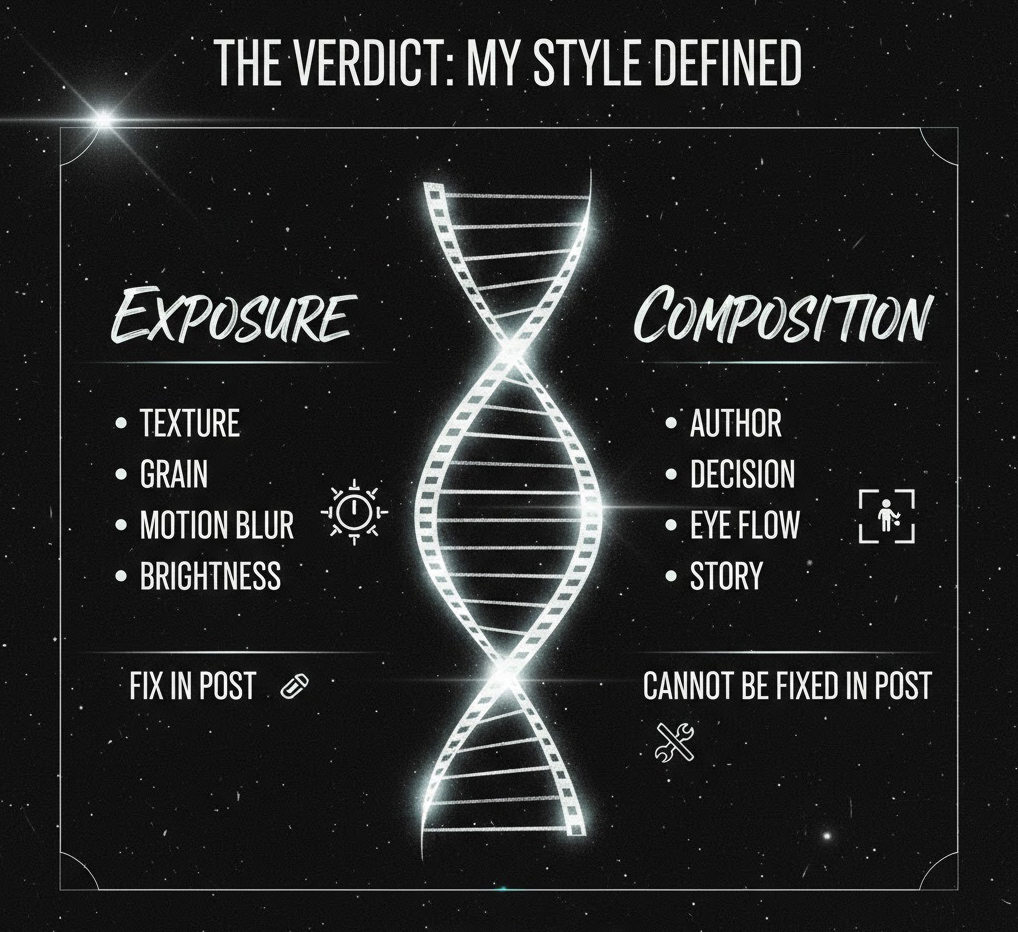
The Verdict: My Style Defined
So, we return to the dilemma. If I had to choose, where does my signature live?
Exposure provides the texture of the film the grain, the motion blur, and the brightness that sets the mood. But Composition is what defines the author. You can often rescue a slightly off exposure in the grade, especially with modern sensors, but you can never move the camera once the shutter has closed. Composition is the one thing that belongs entirely to the filmmaker. It is the decision that cannot be "fixed in post."
Which would you sacrifice first—your histogram or your grid lines?
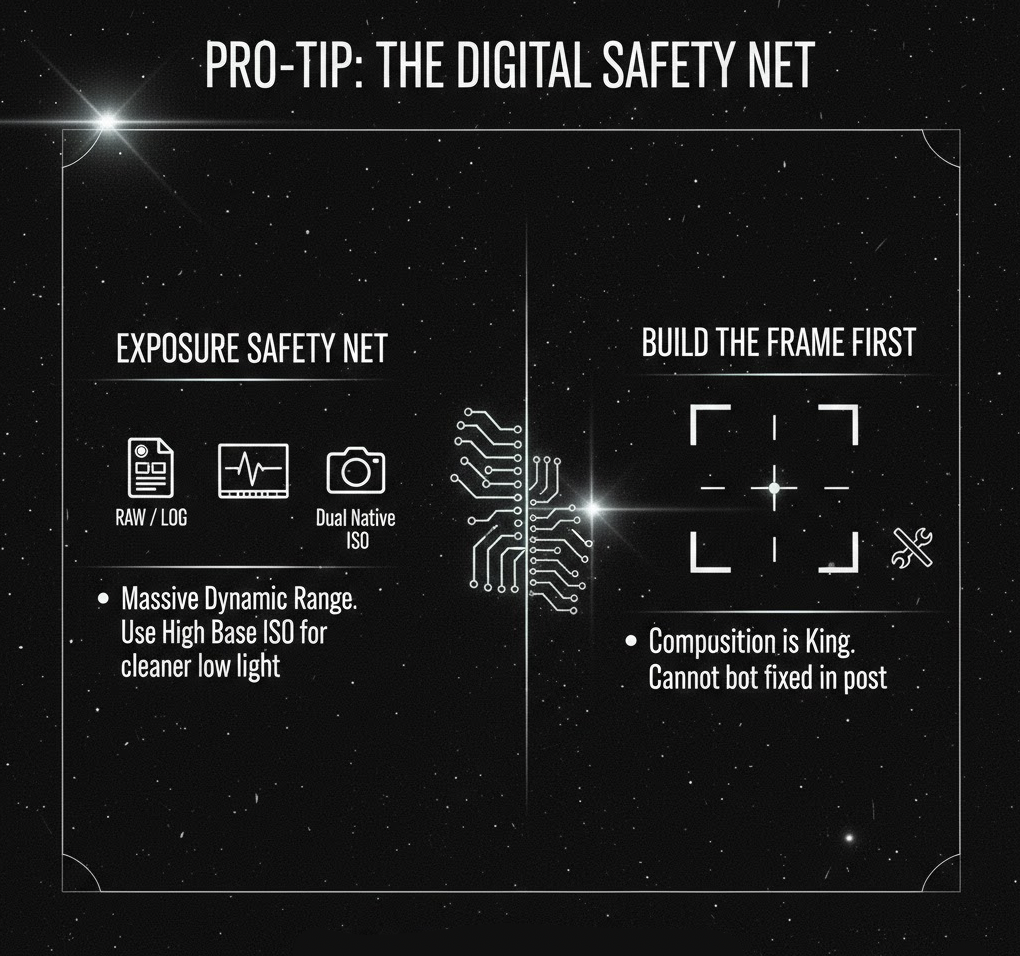
Pro-Tip: The Digital Safety Net Shooting in RAW or Log profiles (like S-Log3) provides a massive dynamic range, but a true professional knows their sensor's Dual Native ISO. In low light, jumping to the "High Base ISO" circuit is often cleaner than boosting a low ISO signal digitally. While these tools give you an exposure safety net, remember: no amount of dynamic range or post-production magic can fix a poorly composed shot. Build the architecture of your frame first.
Author