How I Got the 2000s Camcorder Look with ANY Digital Camera (No Filters)
Mar 03, 2026Get the full story watching the video above ⬆️
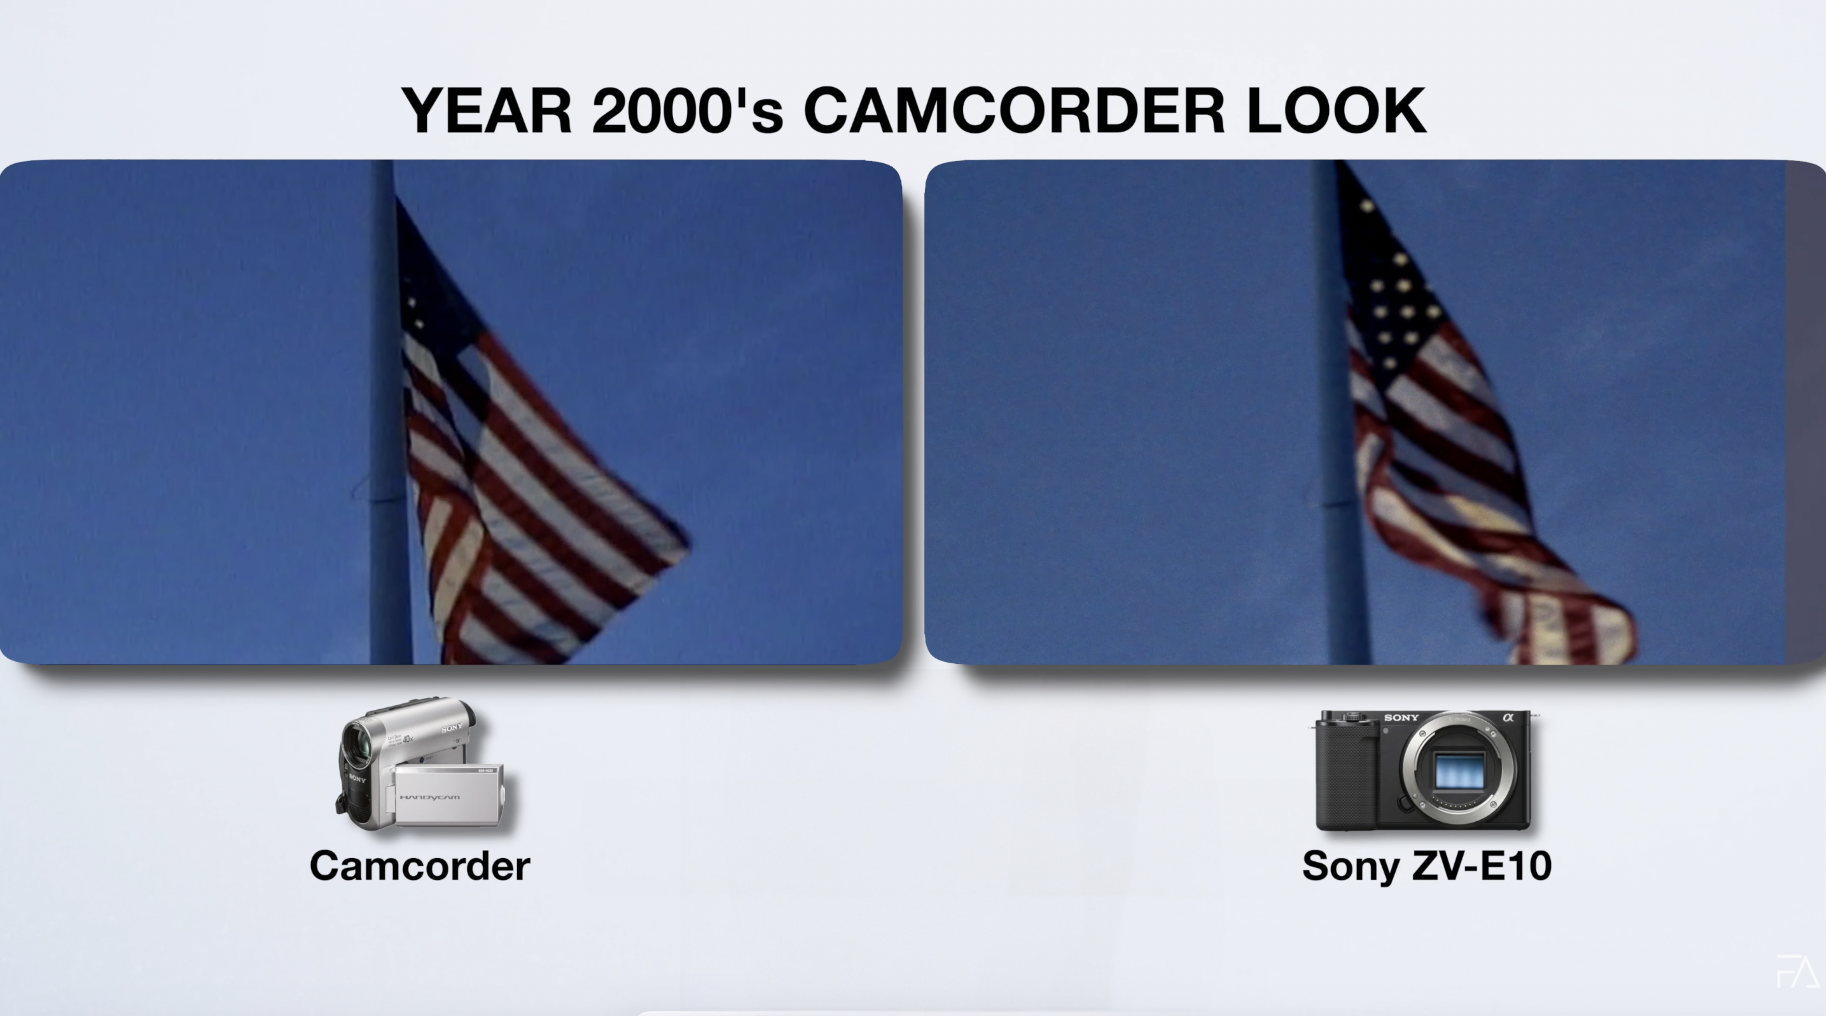
There’s a certain charm to those old 2000s camcorder videos. The soft image, blown-out highlights, muddy contrast, and offbeat color balance all work together to create something that feels nostalgic, imperfect, and deeply familiar. It reminds us of birthday parties, family trips, home movies, and grainy YouTube uploads from the early internet.
And now, a lot of creators are chasing that exact look.
People are buying old camcorders again, hoping to capture that vintage aesthetic. I was one of them. But after going through the hassle of sourcing outdated gear and trying to make it work with a modern editing workflow, I realized there’s a much better way. You can recreate that 2000s camcorder look using the camera you already have — and it can look even better than the real thing.
In this blog post, I’ll walk you through exactly how I did it using digital cameras, and how you can do it too. And if you want to skip the technical work, I’ve built a library of custom LUT packs tailored to specific cameras — so you can get that camcorder look instantly, without filters or plug-ins.
Let’s break it down.
Why I Stopped Using Actual Camcorders
When I first started chasing the camcorder look, my instinct was to go straight to the source. I picked up a used Sony DCR-HC52 from eBay and thought, “This is it. This will give me that dreamy home video aesthetic right out of the box.”
And it did… kind of.
Here’s the problem: old camcorders are a pain to work with today. You can’t just plug them in and go. Most of them are missing batteries, chargers, AV cables, or storage media that’s nearly impossible to find. Many use tapes or outdated memory cards that no modern computer can read. You’ll need digitizers, capture cards, and obscure software to even import your footage. Half the time, it doesn’t work.
What started as a fun experiment quickly turned into hours of troubleshooting and inconsistent results.
So I stopped chasing hardware. And I started studying the look.
What Makes the Camcorder Look So Unique?
It’s hard to define — but you know it when you see it.
- The image is soft but not cinematic.
- Highlights tend to clip quickly.
- Midtones feel faded.
- Colors lean warm or strangely unbalanced.
- And everything has a glow and grain that feels nostalgic.
It’s raw. It’s imperfect. It’s real. That’s the magic of the camcorder aesthetic — and it's surprisingly achievable without owning a camcorder at all.
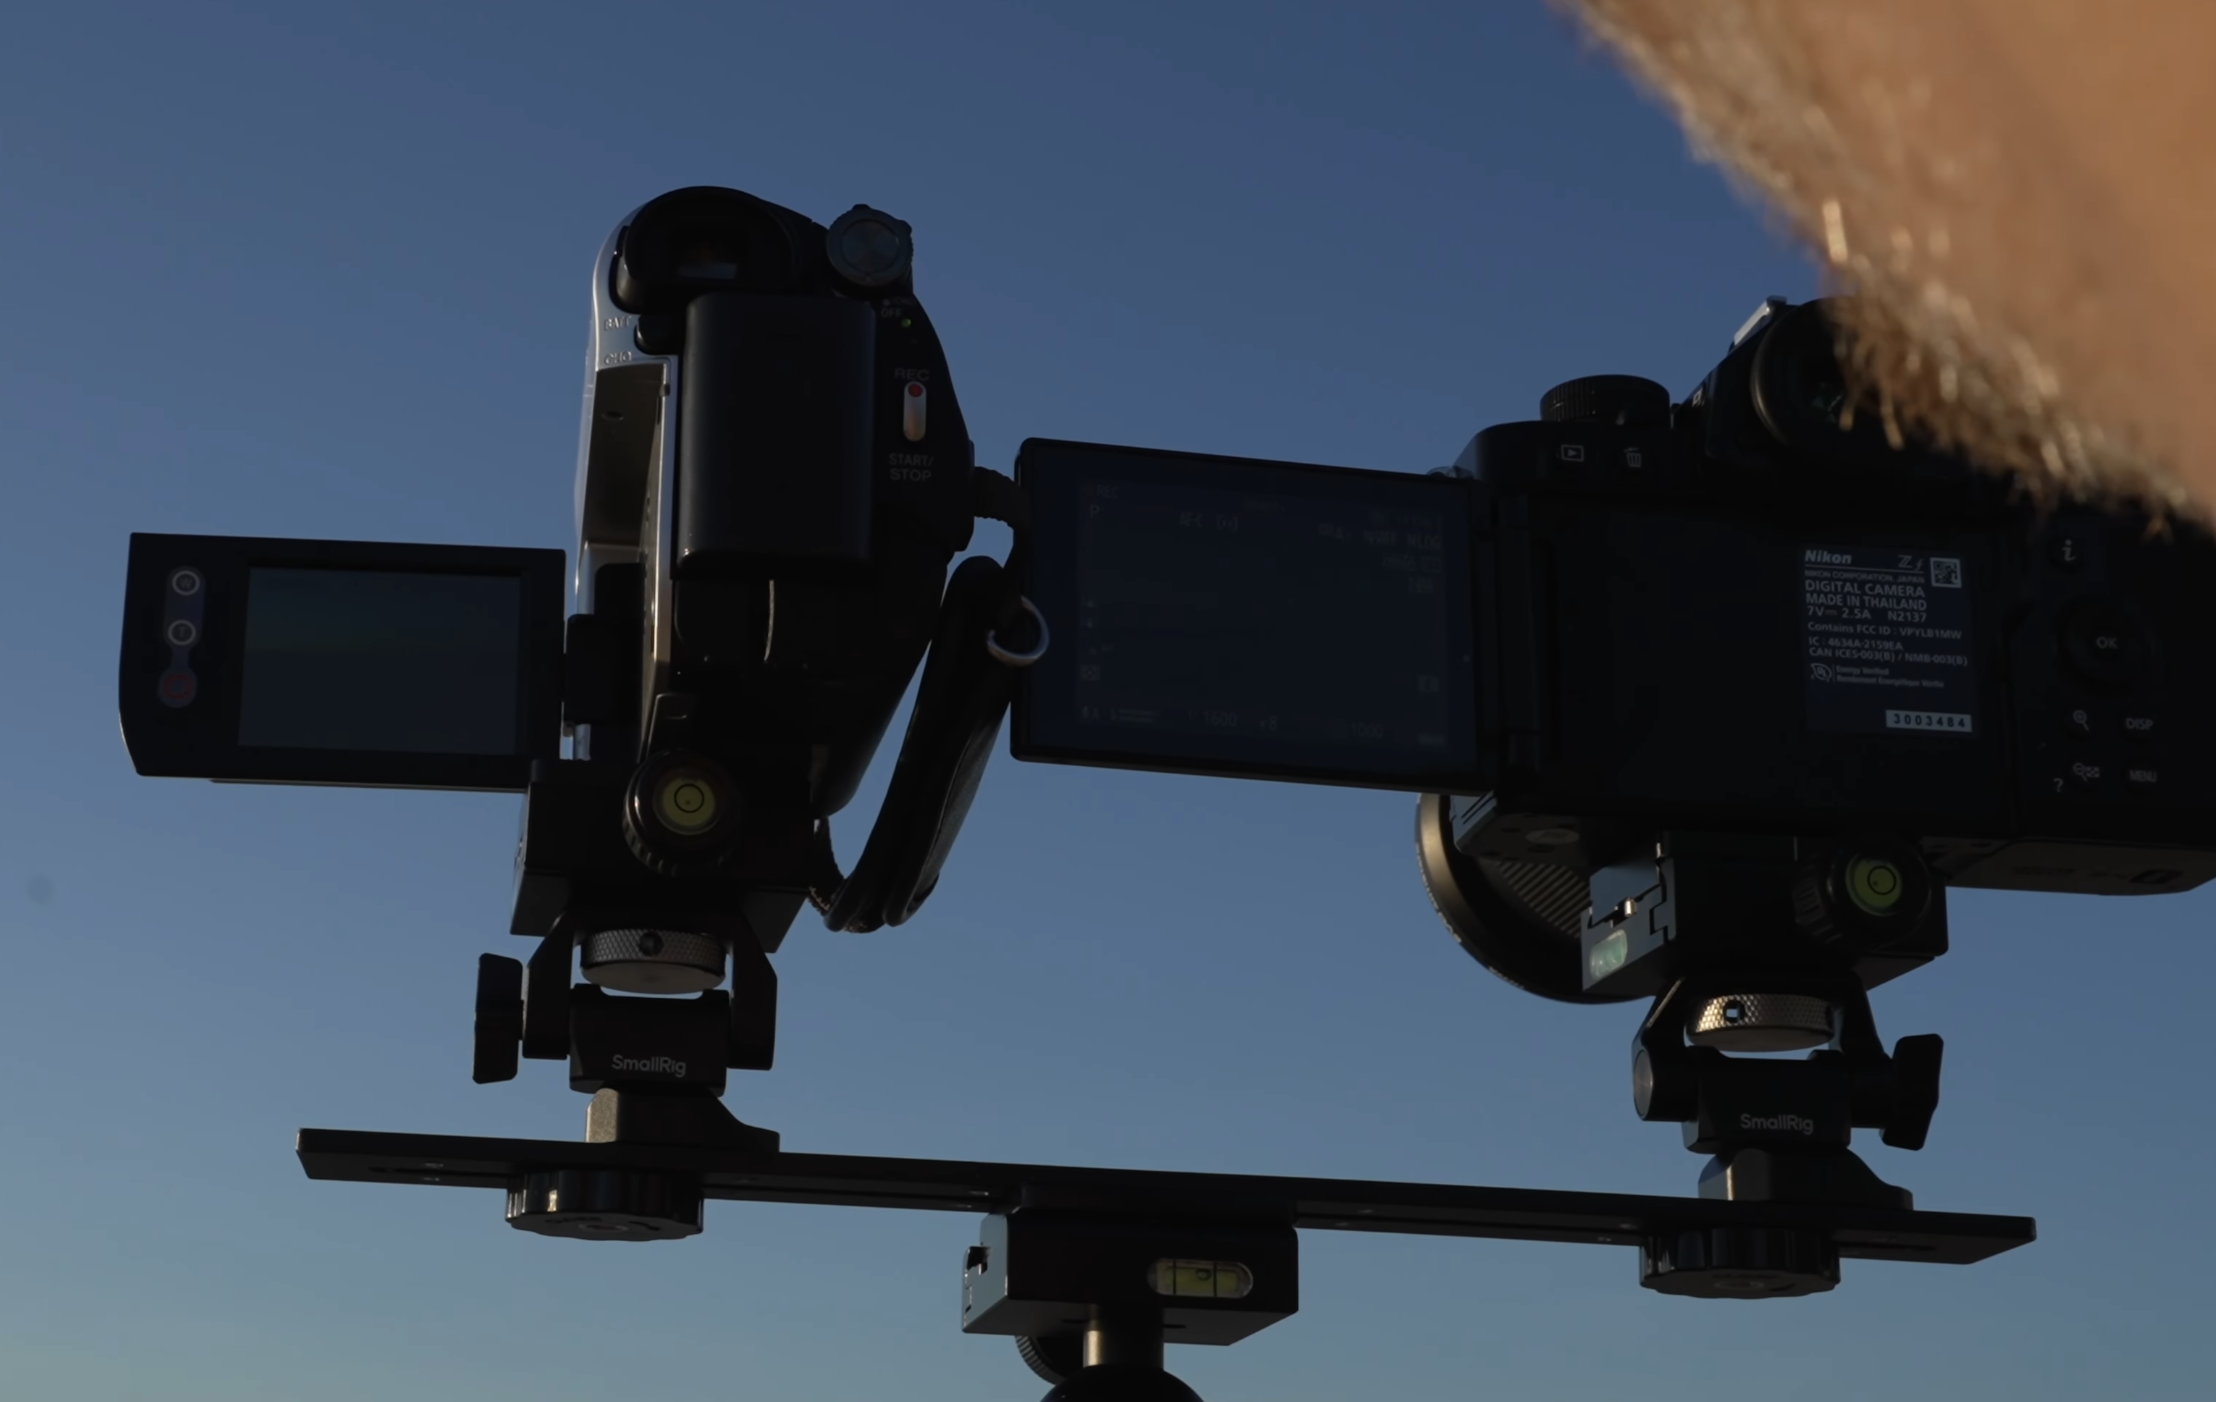
Step One: Study Reference Footage
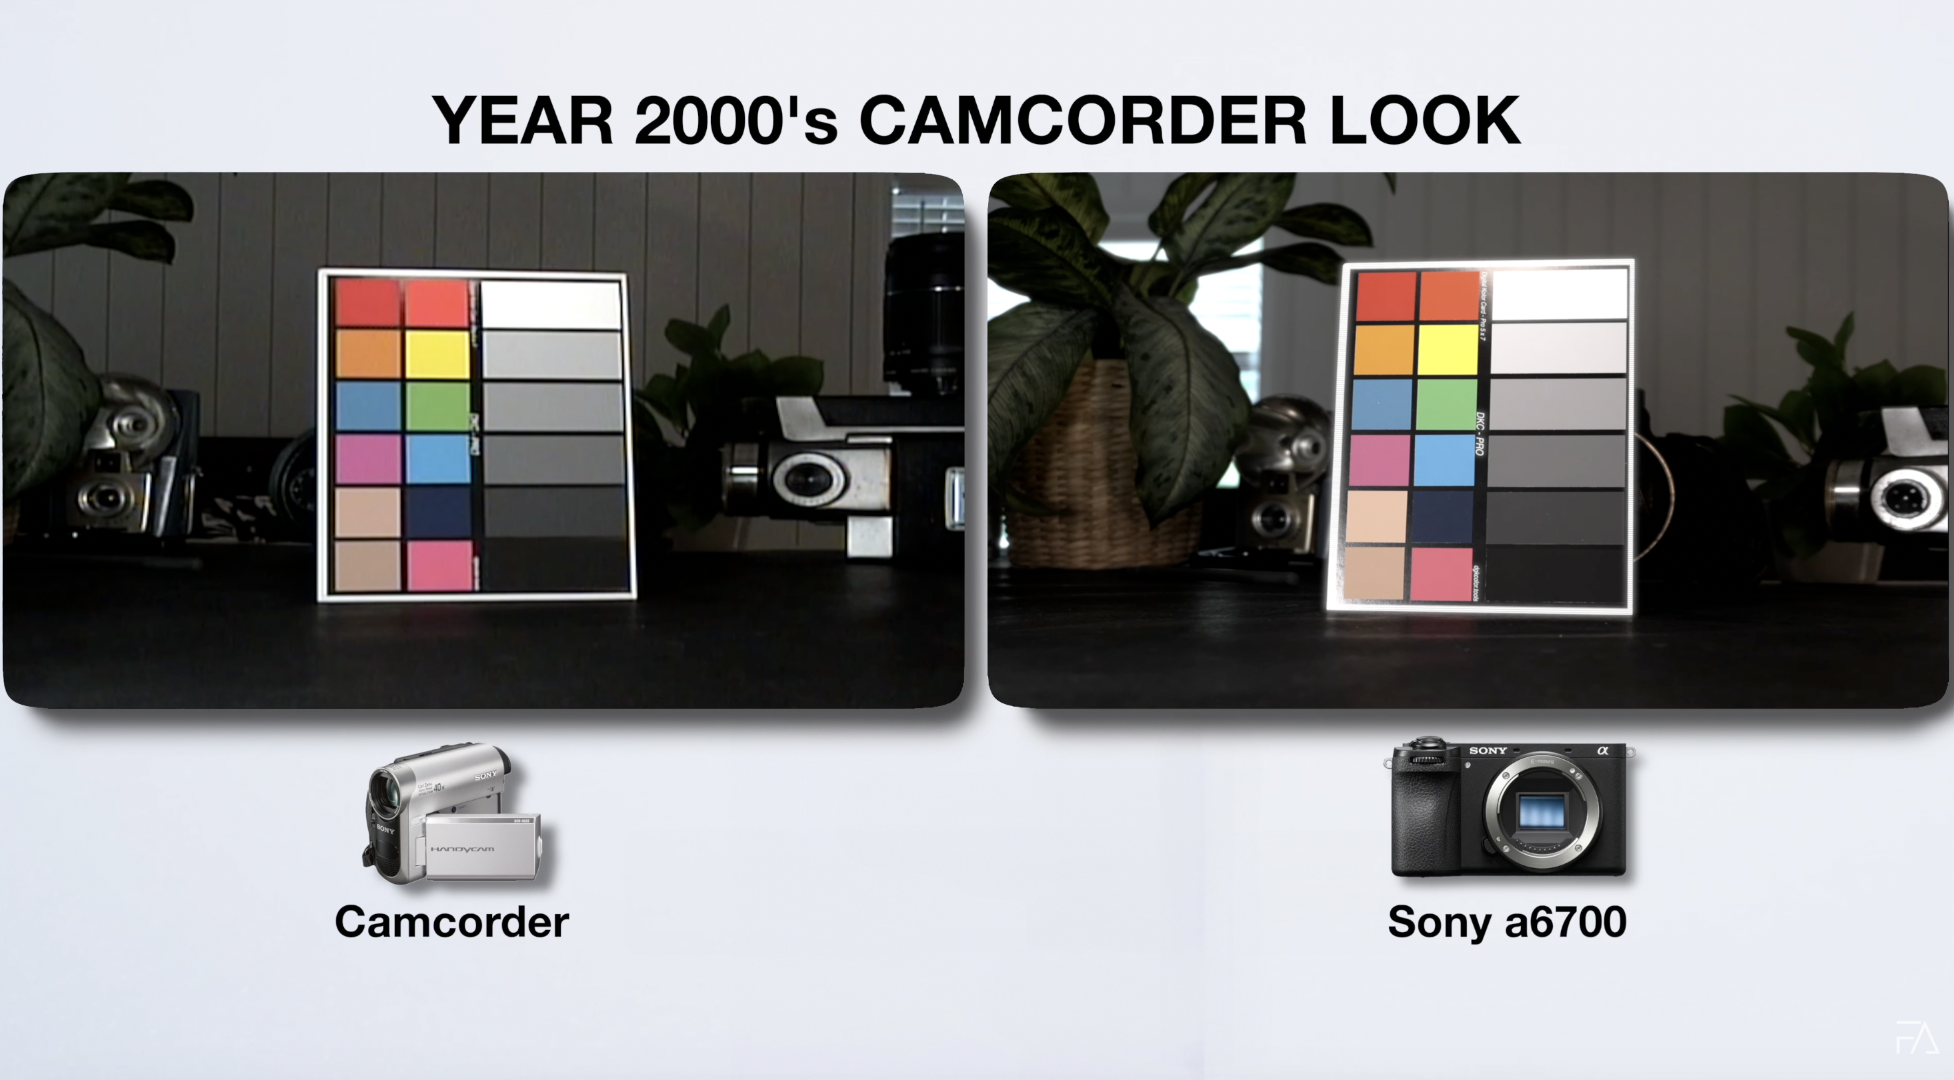
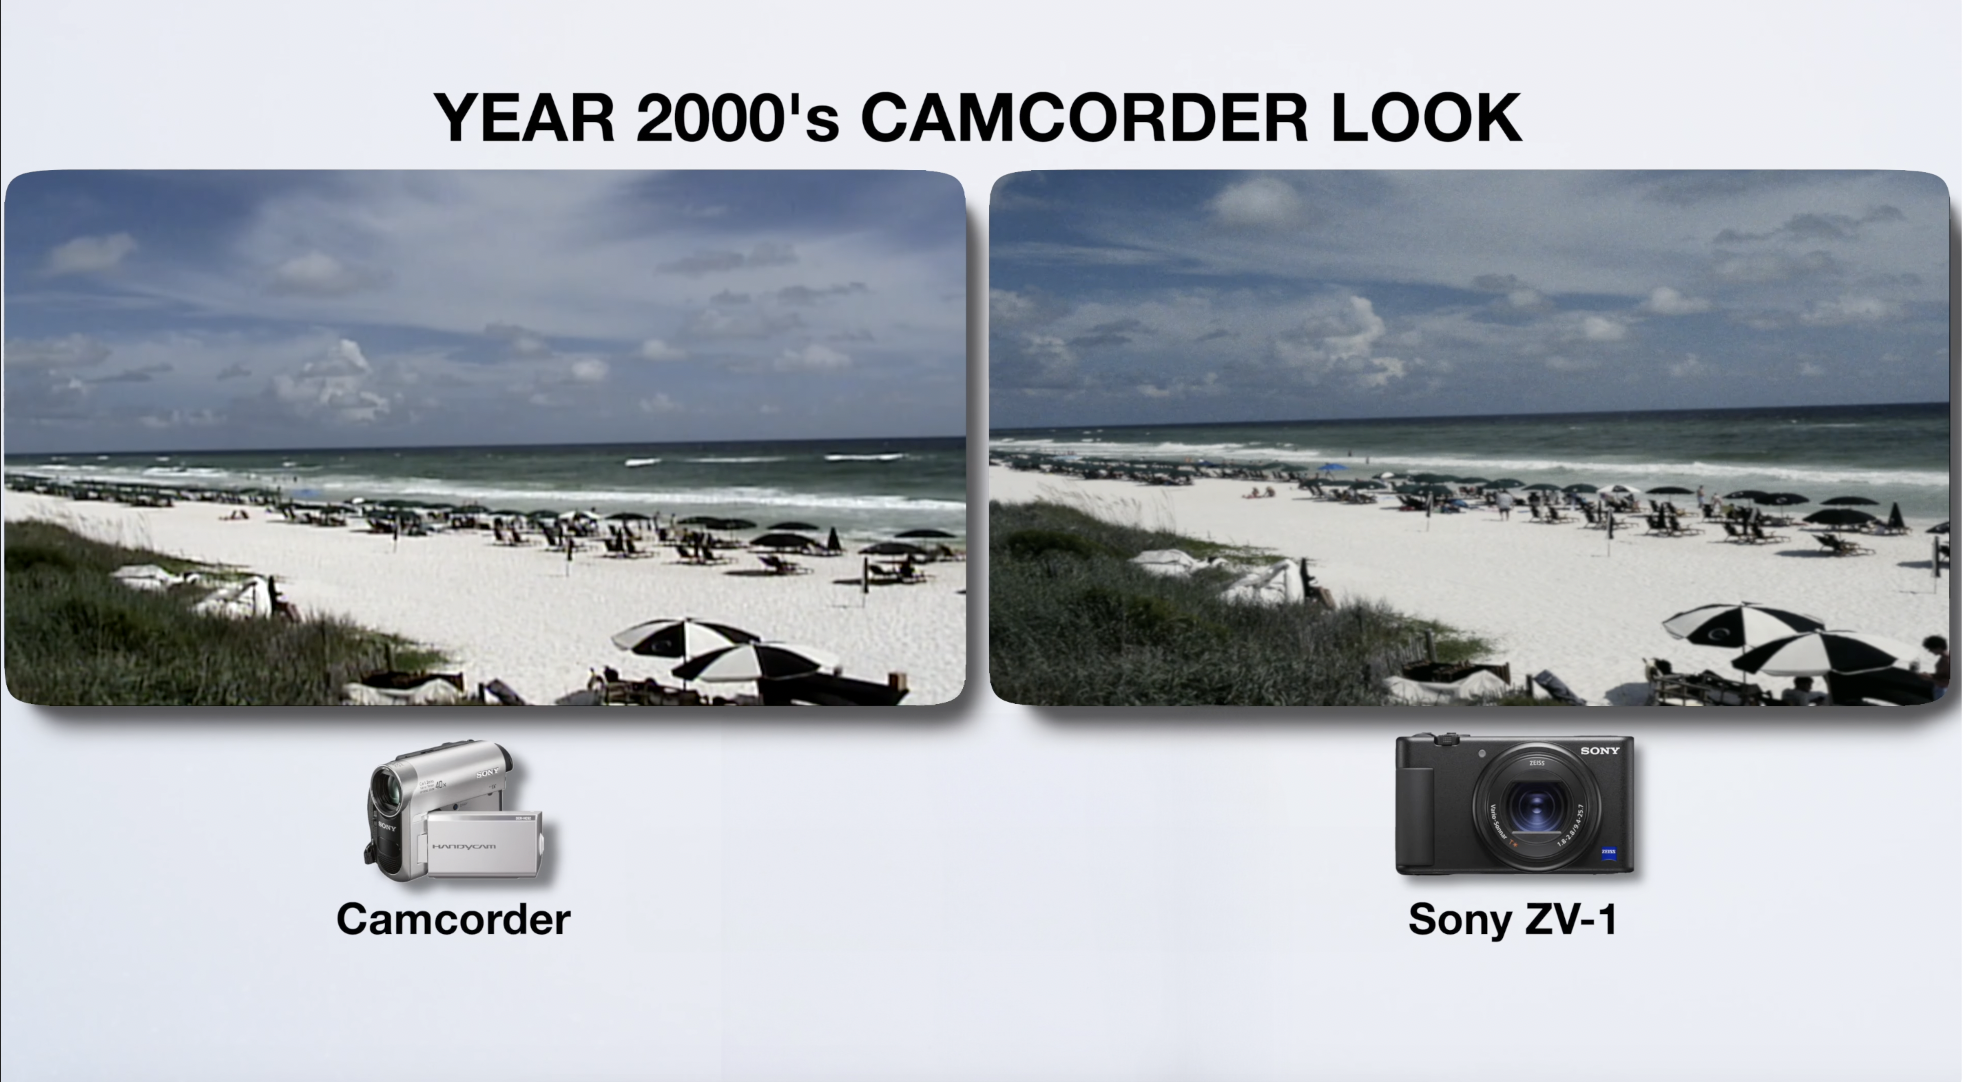
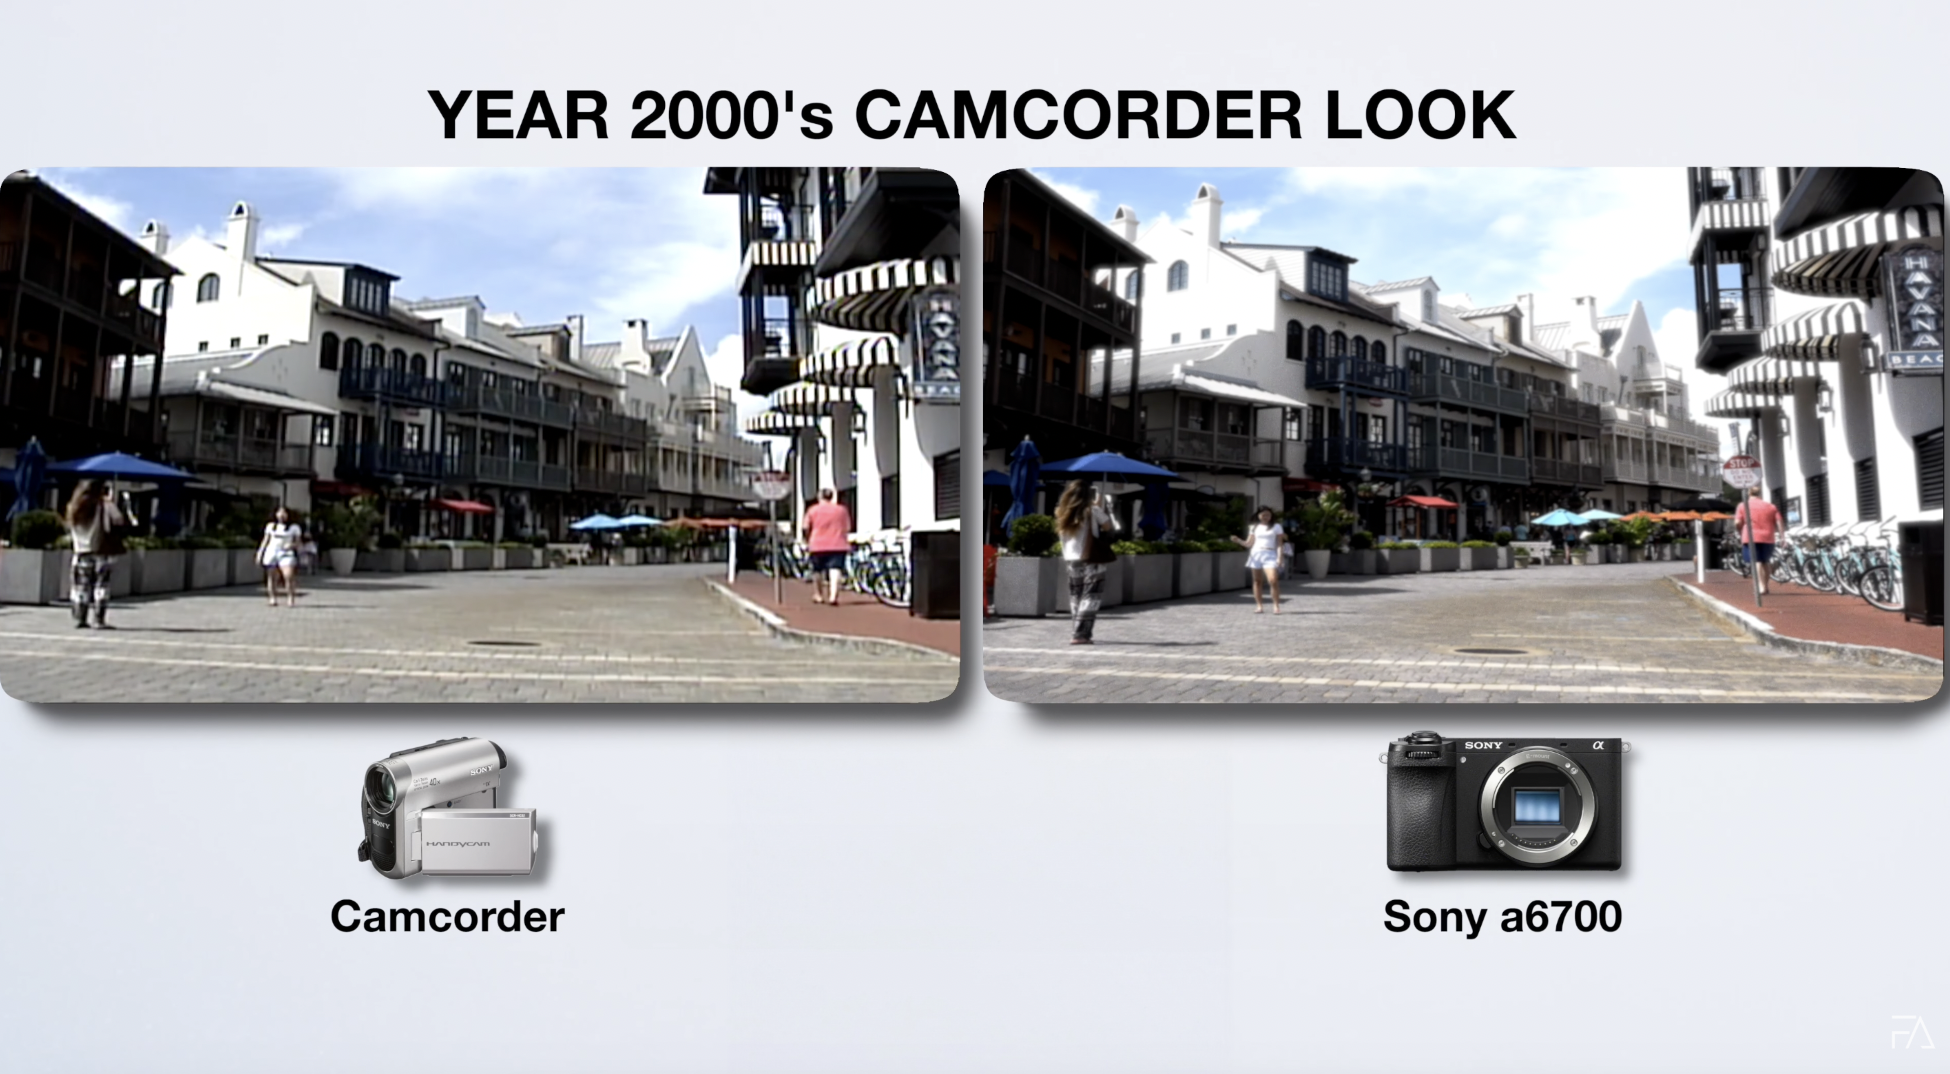
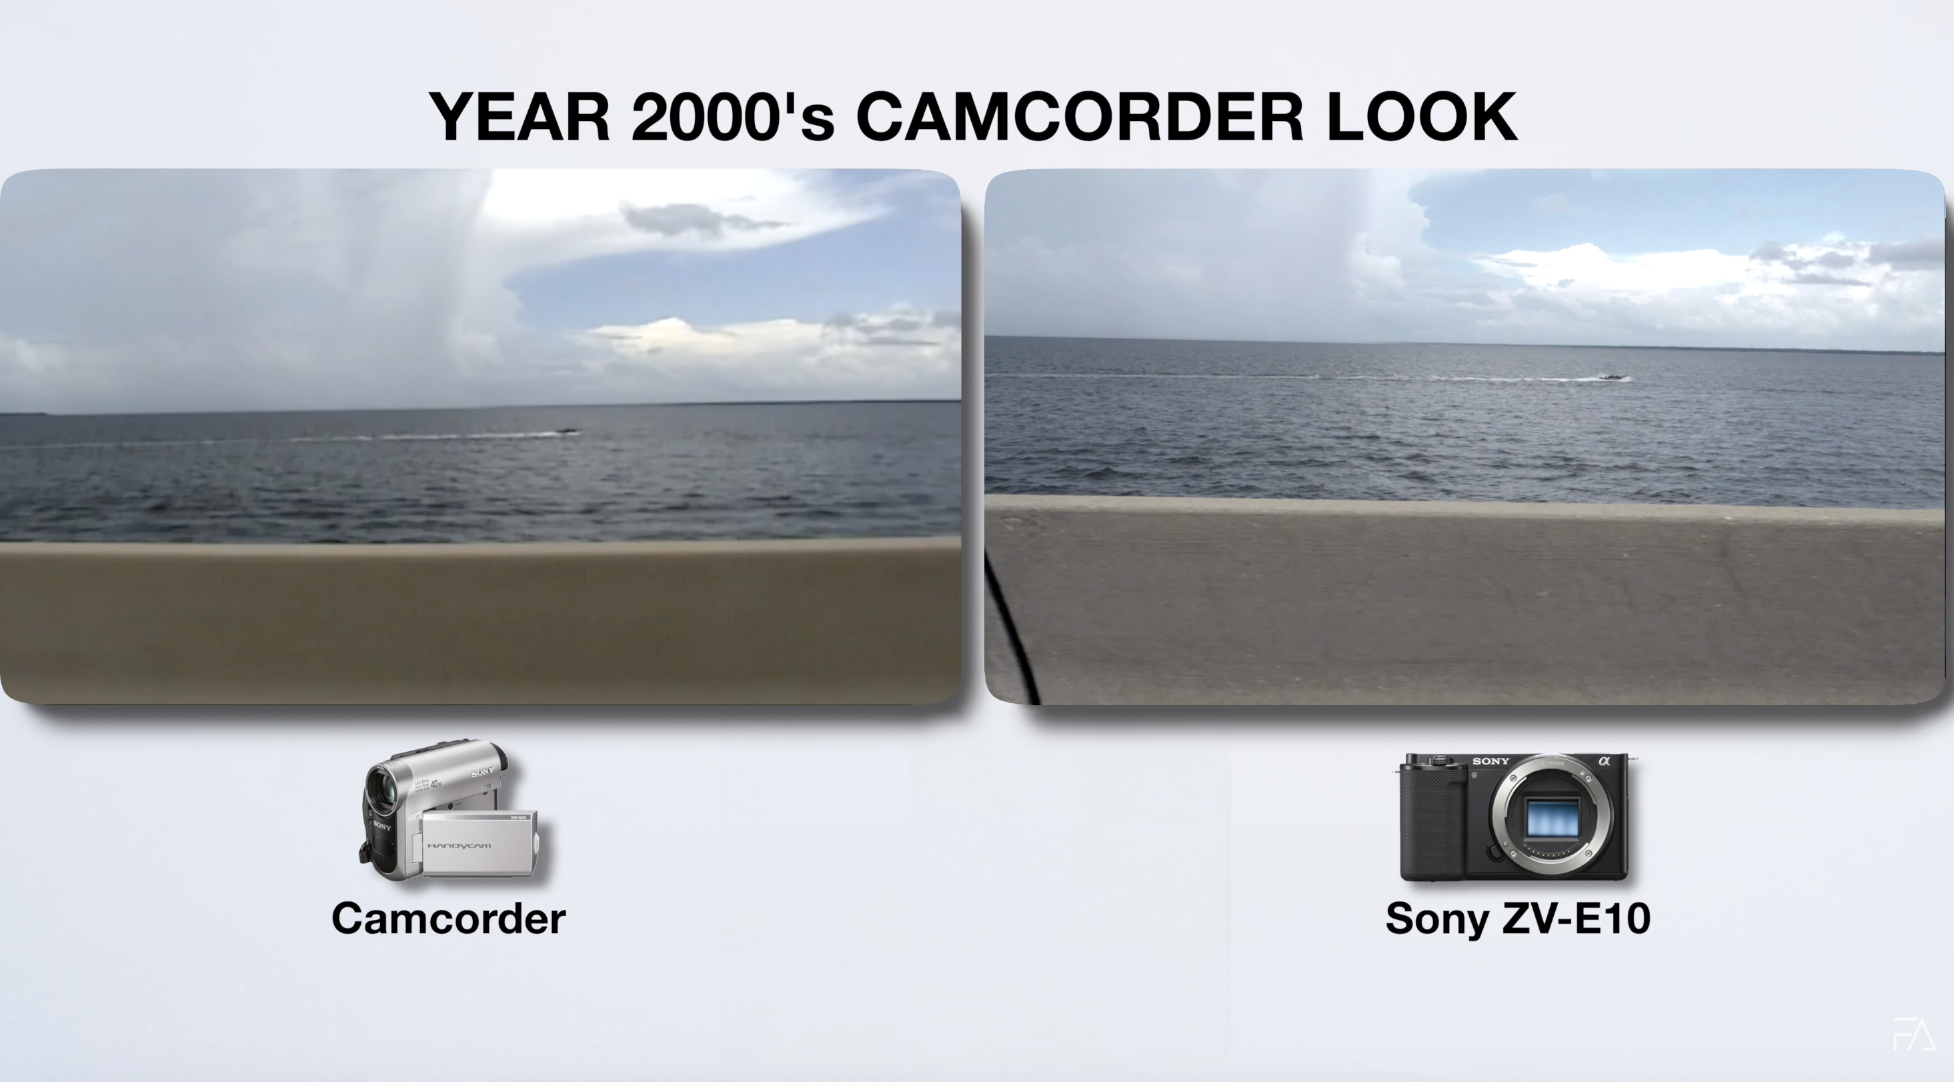
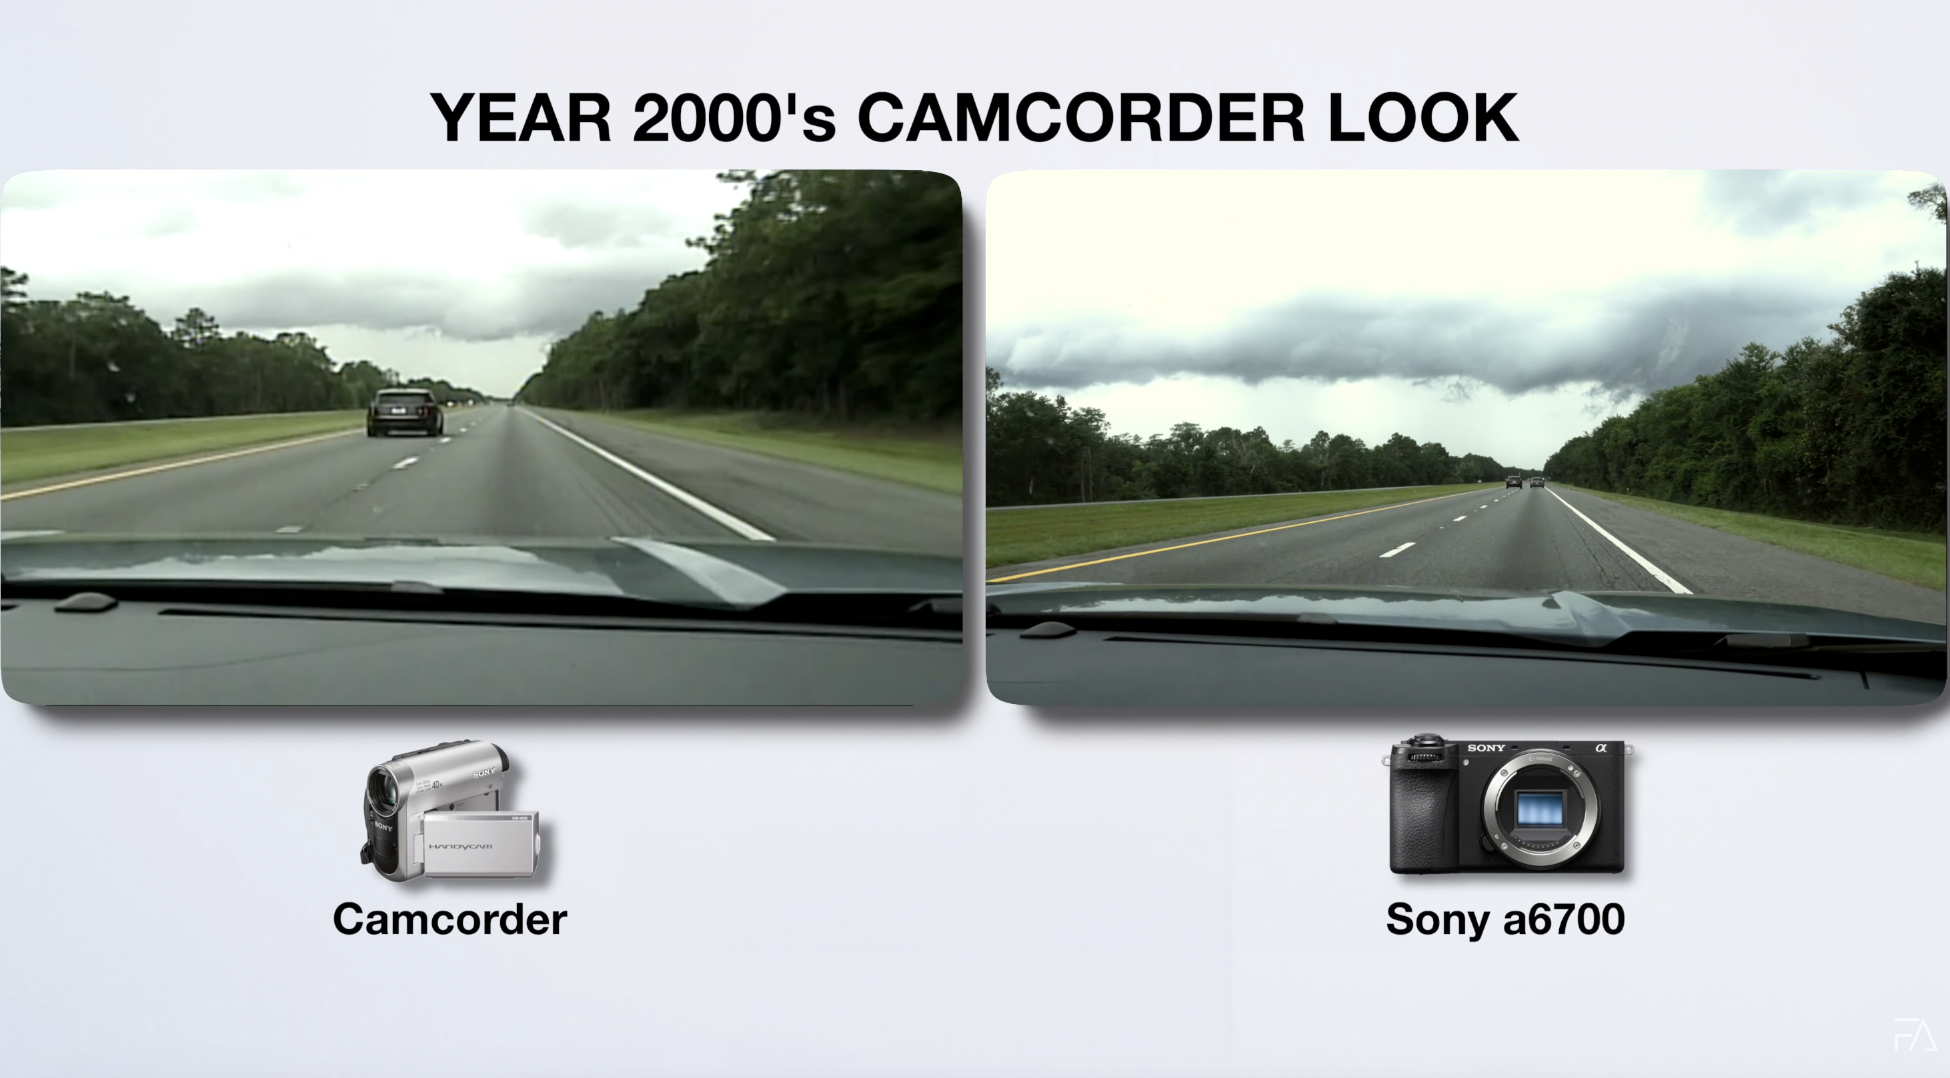
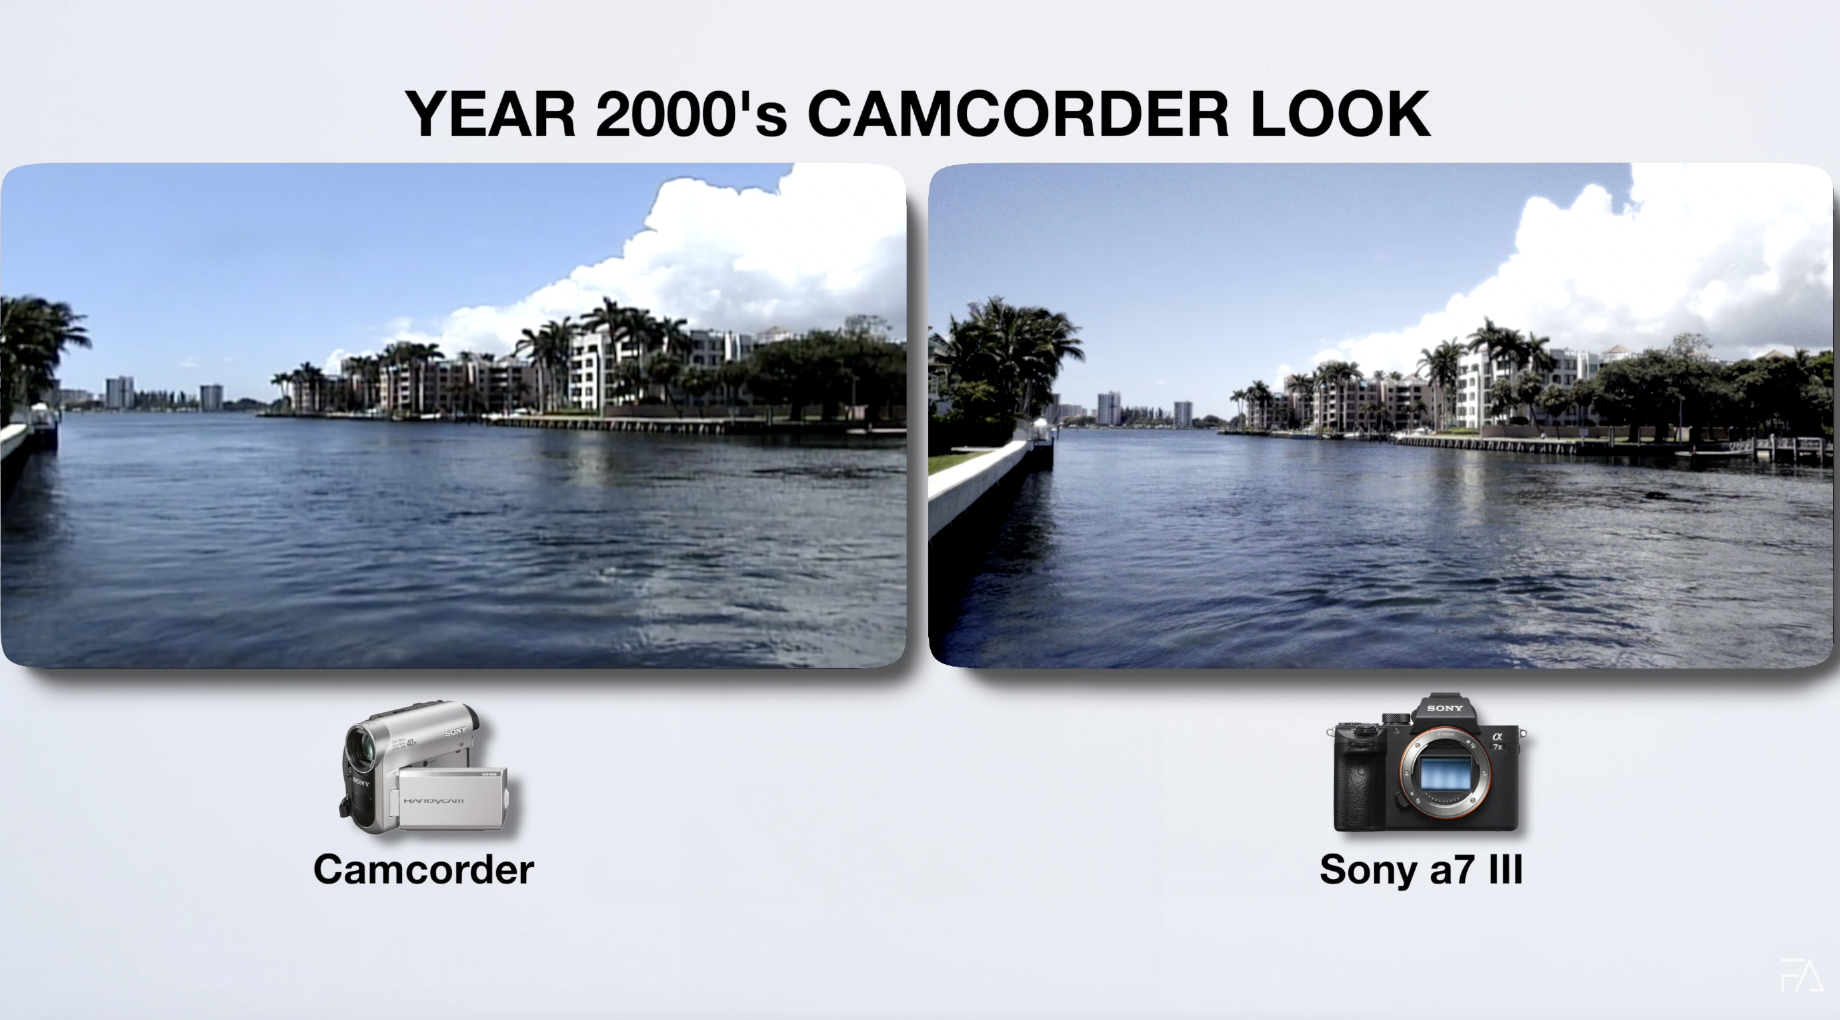
To replicate the look, I started by shooting side-by-side footage on a real camcorder and a modern digital camera. In my case, I mounted a Sony a6700 and the DCR-HC52 on the same tripod and recorded the same scene under the same lighting.
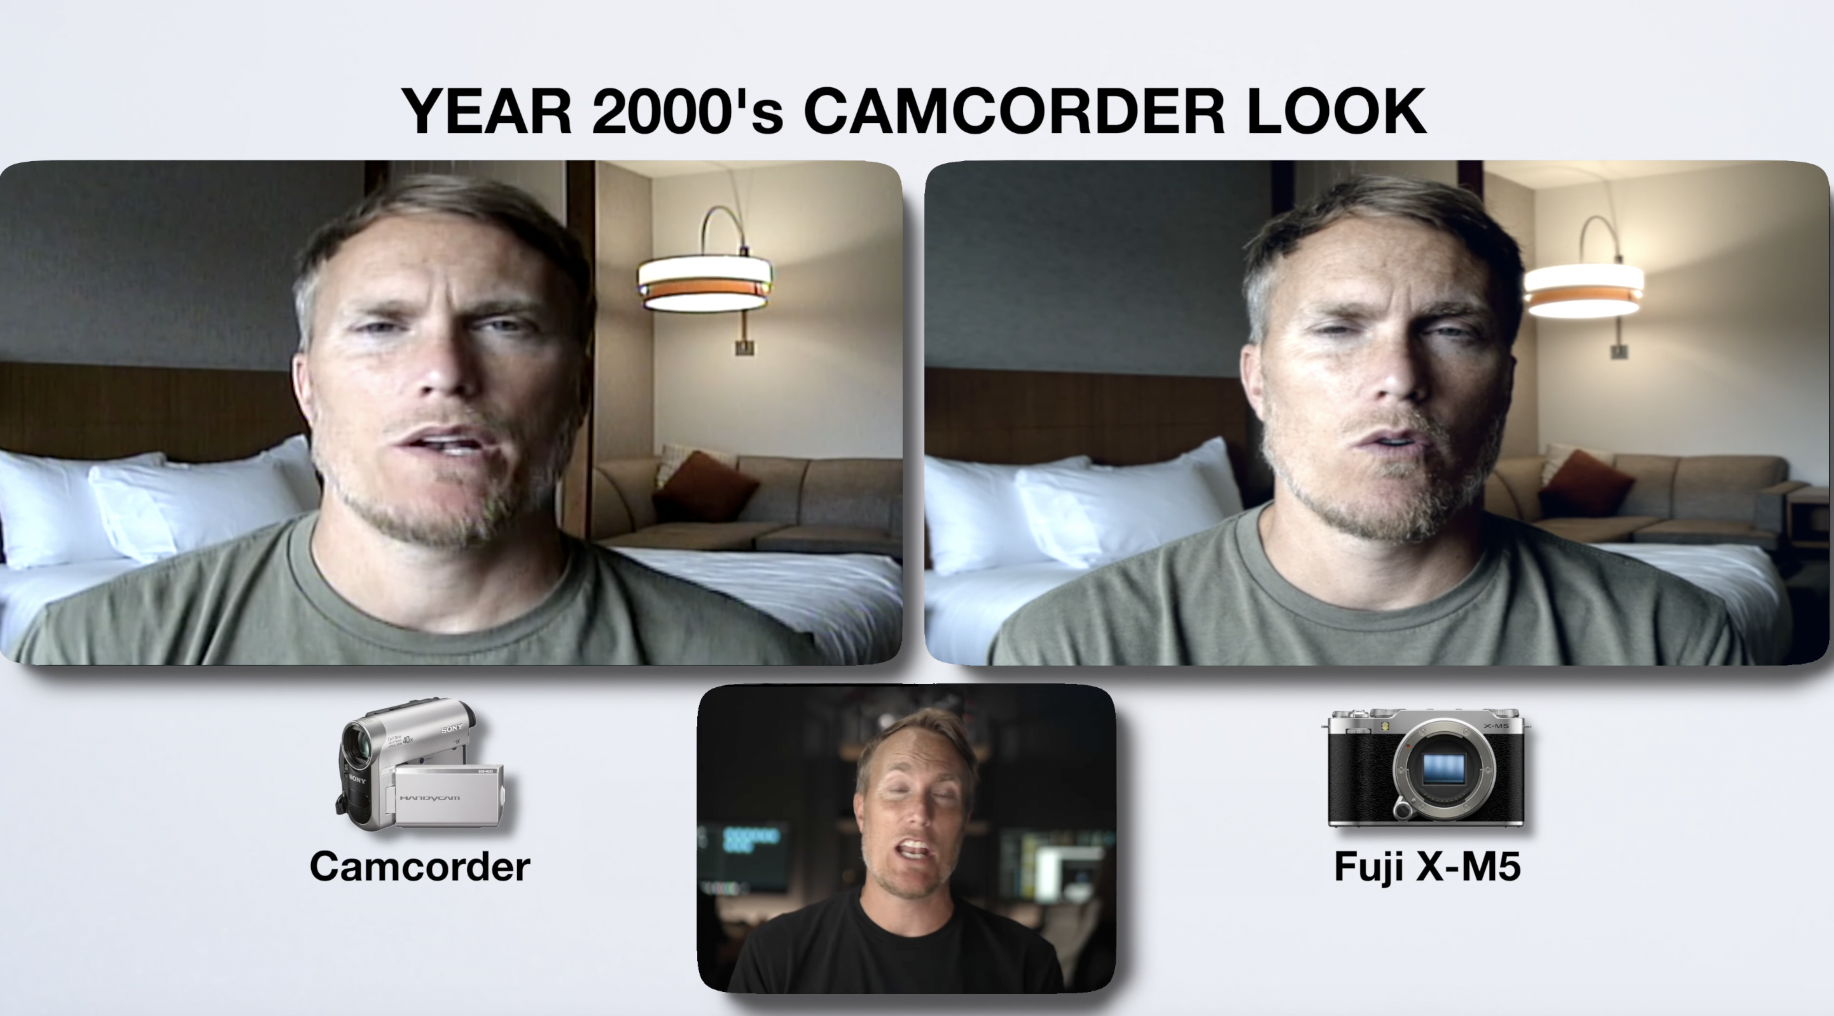
I did this in a variety of lighting conditions and shot different types of subjects — skin tones, foliage, architecture — to get a full picture of how the camcorder interpreted color and contrast across scenarios.
Step Two: Grade Your Footage to Match
Once I had the footage, I opened it in Final Cut Pro using the side-by-side comparison viewer. From there, I used scopes and color wheels to match the camcorder image.
Here's what I looked for:
- Color temperature shifts: Camcorders often lean warm and greenish.
- Blown-out highlights: I lowered whites and clipped the top end of the image.
- Faded blacks: I lifted the shadows slightly to reduce contrast.
- Muted skin tones: I desaturated and softened reds and oranges.
- Low detail and slight blur: I added Gaussian blur or reduced clarity.
Once I got the look dialed in, I saved it as a preset and applied it to other clips shot on the same camera.
Step Three: Add Glow and Grain
This is the secret sauce. Most of the camcorder look comes from the hazy softness and fine digital grain baked into old footage. Modern cameras shoot incredibly clean video, so you need to simulate those imperfections.
Here’s how:
- Grain: Add a fine layer of digital noise. I prefer film-style grain with subtle movement. Most editing apps like Final Cut Pro, CapCut, and LumaFusion have grain presets.
- Glow or Bloom: Add a subtle bloom effect to highlights. This creates that dreamy, slightly smeared look when light sources bloom and bleed.
If you’re using Final Cut, I created a custom preset that includes both glow and grain — with adjustable sliders so you can control the intensity.
The Problem with Most Vintage LUTs
Here’s the issue with most LUTs on the internet: they’re generic. They’re designed to work across any footage, which means they rarely work well with any footage.
Every camera interprets color differently. A Fuji sensor won’t respond the same way as a Sony or an iPhone. So applying a one-size-fits-all LUT often leads to disappointing results — crushed shadows, overblown contrast, or colors that just feel off.
That’s why I created camera-specific camcorder LUT packs.
Tailored LUT Packs for Specific Cameras
I designed each pack based on actual side-by-side camcorder tests. I built LUTs that matched the contrast curves, highlight roll-offs, color shifts, and softness of real camcorder footage. Then I customized each pack to specific camera models to ensure a clean match.
So whether you shoot on:
- The Osmo Pocket 3
- The iPhone 16 Pro
- The Fuji X-M5
- The Sony a6700
- Or even Canon and Panasonic models
There’s a pack made for your camera.
No more endless tweaking. Just shoot clean, apply the LUT, and move on.

Who Is the Camcorder Look For?
This look works across a ton of projects:
- Music videos that blend nostalgia with storytelling
- Short films with flashbacks or analog vibes
- Skits that lean into humor and aesthetic
- YouTube content with a personal, lived-in feel
- Home video-style edits for family or vacation footage
If your project calls for something that feels real, nostalgic, or emotionally familiar — the camcorder look nails it.
Final Thoughts
Recreating the 2000s camcorder vibe with a modern digital camera is 100% possible — and way more practical than using actual old gear. You save time, get more control, and still capture the essence of that raw, imperfect, unforgettable aesthetic.
You can go the manual route: study footage, grade by hand, add glow and grain. Or you can grab one of the camera-specific LUT packs I created and get that look in seconds. I even included before-and-after examples and some free test clips so you can see the results for yourself.
So if you’ve been chasing that dreamy, nostalgic home video feel, skip the eBay hunt. You already have the camera. Now you just need the right LUT.
👉 Grab the Camcorder LUT Pack Here
🎬 Download free before/after test clips
Let the nostalgia roll.
Author